![]() Instructions For Using TNC-X with the DLP-USB232M Module
Instructions For Using TNC-X with the DLP-USB232M Module
Windows 98 Version
For information on Using the Module with Apple or Linux Click here
For information on Using the Module with Windows XP Click here.
General Windows Information
If you are planning to use a version of Windows with TNC-X it is important that the driver you use match the DLP USB module that you purchase. If you obtained your DLP USB module from me, you should download the preconfigured drivers from the TNC-X webpage. However, you do not have to buy the DLP USB module from me; it is available from other sources as well (for example: www.mouser.com). If you obtain the module from a source other than me, you should download the drivers directly from the FTDI driver page. Note: DLP USB modules obtained from me will only work with drivers obtained from the TNC-X webpage. DLP USB modules obtained elsewhere will not work with drivers obtained from the TNC-X webpage, they will only work with drivers obtained directly from FTDI.
Installation on Windows 98 Systems
Download the zip file containing the drivers:
Windows Drivers for TNC-X USB Module (all versions of Windows)
Create a subdirectory on your computer for the files in this archive and extract the files from the ZIP archive to that subdirectory.
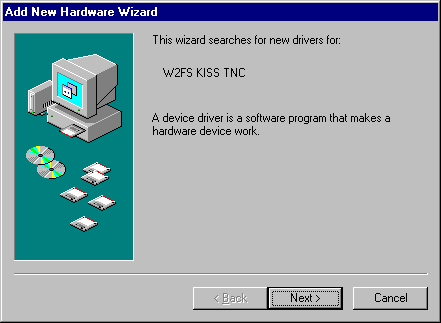
Plug the DLP USB module into your TNC-X. The USB socket where your USB cable attaches should be oriented toward the edge (outside) of the TNC-X PC board. If you have the jumpers set correctly for TNC-X operation (see TNC-X manual) the power LED on TNC-X should light. Also you should see a window pop up on your computer that looks like this:
Push the Next button and the following screen will appear:
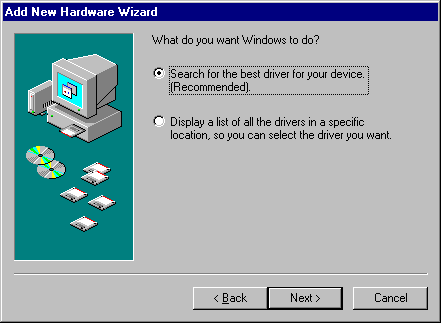
Leave the "Search" radio button selected and push the Next button at the bottom of the screen. You will then see the following:
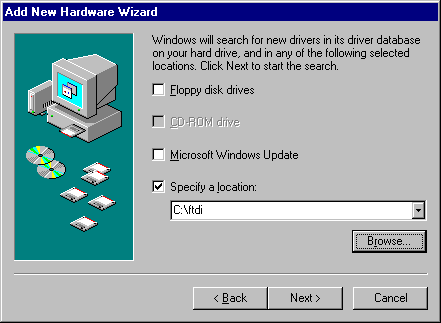
Push the "Browse" button and find the directory that contains your drivers. Then press the next button. The following screen will appear (only the specified path will be different):
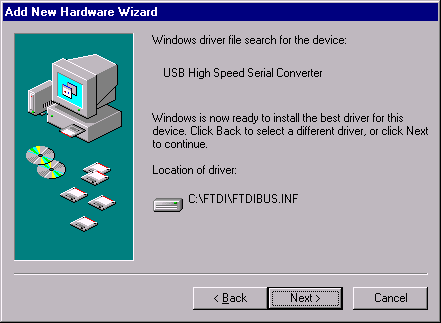
Once again press the Next button and it will take a few moments while the driver is installed. Then the following screen will appear:
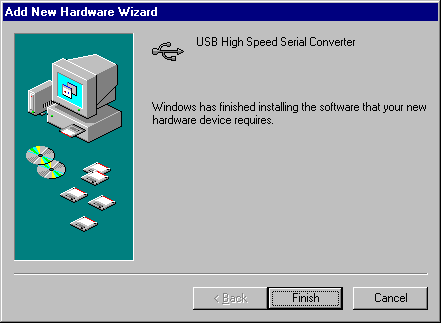
Now just push the "Finish" button. Your DLP-USB232M module has now been installed. However, since it is going to appear on your computer as a serial port, the operating system will now find a "new" serial port and install it. This will require no intervention by you.
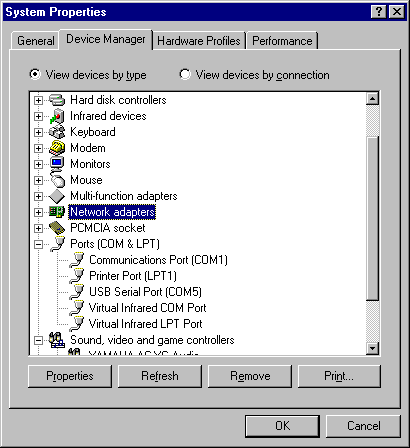
This procedure may not cause your DLP USB module to appear on the COM port that you prefer, however. This can be adjust after installation. Go to the Control Panel and select "System". The Device manager will appear. Expand the ports tab and you will be able to see which COM port has been selected for your USB module. In the screen below, for example, COM5 has been selected:
Since many programs do not support COM choices greater than 4, I wanted to change this to a lower number. To do this click on the USB Serial Port entry and press the "properties" button. The select the "Port Settings" tab, and then push the "Advanced" button. You should see the following screen.
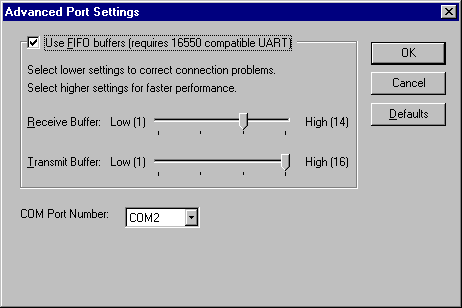
This screen will allow you to adjust the USB module to the COM port of your own choosing. In the above example, I have changed the port number to COM2. Be careful not to select a COM port that is already in use!